Първата стъпка, използвайте get cli за генериране на основната структура на проекта
https://pub.dev/packages/get_cli
get create project:strapi_flutter_internation_poc
  1) Flutter Project
  2) Get Server
1
? What is your company's domain?  Example: com.yourcompany  com.nasawz.strapi_flutter_internation_poc

what language do you want to use on ios?

  1) Swift
  2) Objective-C
1

what language do you want to use on android?

  1) Kotlin
  2) Java
1

Do you want to use null safe?

  1) Yes!
  2) No
1

do you want to use some linter?

  1) no
  2) Pedantic [Deprecated]
  3) Effective Dart [Deprecated]
  4) Dart Recommended
1

Running `flutter create D:\poc\strapi_flutter_internation_poc` …

$ flutter create --no-pub -i swift -a kotlin --org com.nasawz.strapi_flutter_internation_poc D:\poc\strapi_flutter_internation_poc
Creating project ....
  lib\main.dart (created)
  pubspec.yaml (created)
  README.md (created)
  test\widget_test.dart (created)
  .gitignore (created)
  .idea\libraries\Dart_SDK.xml (created)
  .idea\libraries\KotlinJavaRuntime.xml (created)
  .idea\modules.xml (created)
  .idea\runConfigurations\main_dart.xml (created)
  .idea\workspace.xml (created)
  .metadata (created)
 .......
 ........
Wrote 81 files.

All done!
In order to run your application, type:

  $ cd .
  $ flutter run

Your application code is in .\lib\main.dart.


Running `flutter pub get` …

$ flutter pub get
Running "flutter pub get" in strapi_flutter_internation_poc...      2,666ms
$ dart migrate --apply-changes --skip-import-check
Migrating D:\poc\strapi_flutter_internation_poc

See https://dart.dev/go/null-safety-migration for a migration guide.

Analyzing project...
All sources appear to be already migrated.  Nothing to do.
✓  File: analysis_options.yaml created successfully at path: analysis_options.yaml
  1) GetX Pattern (by Kauê)
  2) CLEAN (by Arktekko)
1

Your lib folder is not empty. Are you sure you want to overwrite your application?
 WARNING: This action is irreversible

  1) Yes!
  2) No
1
✓  'Package: get installed!
✓  File: main.dart created successfully at path: lib\\main.dart
✓  File: home_controller.dart created successfully at path: ./lib\app\modules\home\\controllers\\home_controller.dart
✓  File: home_view.dart created successfully at path: ./lib\app\modules\home\\views\\home_view.dart
✓  File: home_binding.dart created successfully at path: ./lib\app\modules\home\\bindings\\home_binding.dart
✓  File: app_routes.dart created successfully at path: lib\\app\\routes\\app_routes.dart
✓  File: app_pages.dart created successfully at path: lib\\app\\routes\\app_pages.dart
✓  home route created successfully.
✓  Home page created successfully.
✓  GetX Pattern structure successfully generated.

Running `flutter pub get` …

$ flutter pub get
Running "flutter pub get" in strapi_flutter_internation_poc...
Досега имаме структура на проекта, базирана на Flutter.
След това нека включим Strapi в проекта.
Стъпка втора, интегрирайте в Strapi
https://strapi.io/
Въведете директорията на проекта
cd .\strapi_flutter_internation_poc
Използвайте "create-strapi-app", за да инициализирате проекта
npx create-strapi-app strapi
npx: installed 146 in 14.856s
? Choose your installation type Quickstart (recommended)
? Would you like to use a template? (Templates are Strapi configurations designed for a specific use case) No
Creating a quickstart project.
Creating a new Strapi application at D:\poc\strapi_flutter_internation_poc\strapi.
Creating files.
Dependencies installed successfully.

Your application was created at D:\poc\strapi_flutter_internation_poc\strapi.

Available commands in your project:

  yarn develop
  Start Strapi in watch mode.

  yarn start
  Start Strapi without watch mode.

  yarn build
  Build Strapi admin panel.

  yarn strapi
  Display all available commands.

You can start by doing:

  cd D:\poc\strapi_flutter_internation_poc\strapi
  yarn develop


> strapi@0.1.0 build D:\poc\strapi_flutter_internation_poc\strapi
> strapi build "--no-optimization"

Building your admin UI with development configuration ...

√ Webpack
  Compiled successfully in 27.43s

Running your Strapi application.
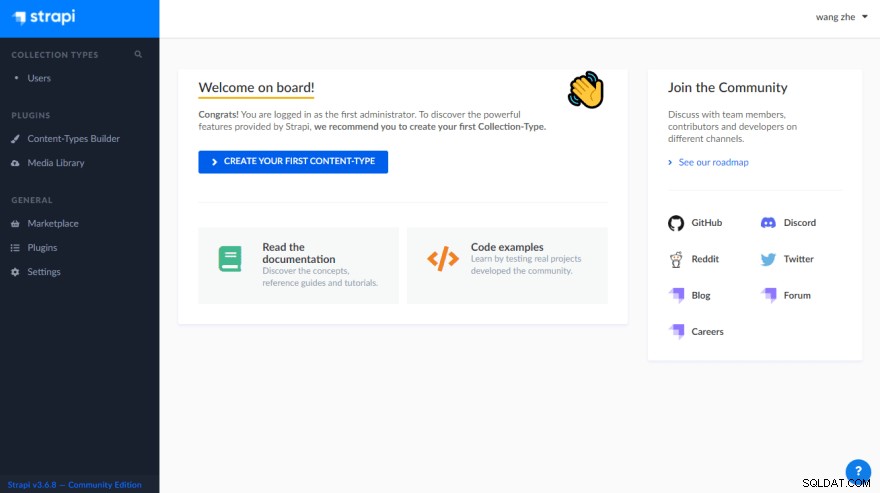
Тук Strapi се инсталира успешно и стартира локално https://localhost:1337

След като можете да видите този интерфейс, можете първо да го поставите на пауза и първо да промените конфигурацията на Strapi. Насочете адреса на базата данни Sqlite по подразбиране в Strapi към папката с активи на проекта Flutter.
Първо създайте съответната папка assets/db
редактирайте [project_root]/strapi/config/database.js
module.exports = ({ env }) => ({
  defaultConnection: 'default',
  connections: {
    default: {
      connector: 'bookshelf',
      settings: {
        client: 'sqlite',
        filename: env('DATABASE_FILENAME', '../assets/db/data.db'),
      },
      options: {
        useNullAsDefault: true,
      },
    },
  },
});
Рестартирайте проекта Strapi, след като модификацията приключи
npm run develop
Регистрирайте администраторски акаунт
admin@poc.com
nrVABVAAYq9geTY
Променете конфигурационния файл pubspec.yaml на проекта Flutter и поставете пътя на базата данни под активи
flutter:
  assets:
    - assets/db/
  uses-material-design: true
В последващи разработки Flutter може да използва файловете на базата данни на Strapi.
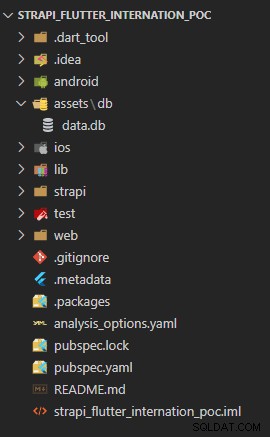
Сега вижте структурата на проекта, както е показано по-долу
